Showing posts with label quick meal prep. Show all posts

Thursday, September 24, 2009

Italian Style Chicken Sautee and Polenta


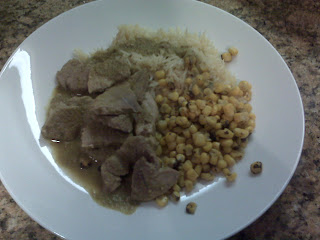
Still experiencing cold and foggy weather in San Francisco so the need for comfort foods continues. Wanted to do something a bit different with boneless chicken thighs since I seem to be continually oven-baking them. So tonight decided to saute boneless thighs in a tomato sauce. As sides, I made polenta and steamed zucchini.

Set up all your ingredients;

  • thinly sliced onion (approx 1/3 cup)
  • 2 minced cloves of garlic (vary per your preference)
  • package of boneless chicken thighs (clean and cut to more manageable sized pieces) [approx 6 or little over a pound]
  • can of tomatoes (DO NOT DRAIN and if they are whole cut them up)
  • 2 tablespoon red wine
  • salt, pepper to taste
  • 1/2 teaspoon dried oregano

Took out my cast iron pot, and heated approx 2 tablespoons of olive oil over medium high heat. When it was slightly smoking, tossed in onion and garlic. Let those cook for about three min, until they just started to brown, then pushed to the side and gradually added pieces of boneless chicken thighs to brown.

You want to do this slowly to keep the heat high enough to brown, so added a few pieces, brown on one side, turn over, move the onions/garlic to cover and add more chicken. Do this until all the chicken has been added and turned over. Now add the red wine, salt, pepper and oregano; scrap the brown bits off the pan a bit and then add the tomatoes. Let this all simmer for approximately 25 min.


Polenta - a cornmeal mush really - becomes a rich, creamy side dish with a bit of butter and cheese added. I set up the zucchini (approximately three) in a steamer and then start on the polenta. In a heavy pan boil 3 1/4 cups of water. As it starts boiling, add 1 tablespoon of salt and turn the burner to medium low heat so that the water is just simmering. Add one cup of coarse-grained cornmeal in a fine stream - so that you can really almost see eat grain hitting the water - stirring with a wooden spoon. Continue stirring while adding all the polenta and then for the next 10 minutes. (Remember in the last five minutes turn on the burner under the zucchini.) The polenta is done when it tears away from the sides of the pot as you stir. Add 2 tablespoons of butter and 1/4 cup of grated Parmesan cheese.


This made four servings so increase as needed.
Thursday, July 10, 2008

Marinate After You Cook?


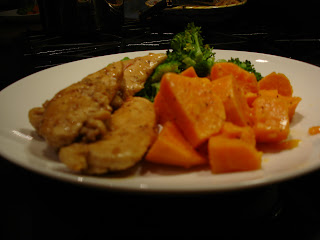
I cook chicken a whole lot but really it is so versatile it is hard to get sick of. I had defrosted some breast tenders and decided to look for a new way to cook them in How to Cook Everything by Mark Bittman.

I found a recipe that you can grill or broil chicken cutlets but the thing that caught my eye is that you marinate the chicken after cooking so I decided to try it.

I set the broiler to Hi then rinse and pat dry my chicken tenders (about 1 to 1 1/2 pounds or equivalent of two breasts). I rub the tenders with 1 tablespoon of vegetable or peanut oil and the cut side of a 1 clove of garlic then season them with salt and pepper. I place them on a cookie sheet and place on the top rack of the broiler and grill for 2-3 minutes per side. (If you have thicker pieces I would broil for 3-4 min per side. I hate dry chicken so I prefer to cook it for less time as I know it will continue to cook in the post-marinade.)

While the chicken is broiling I assemble the marinade. In a saucepan, I place the following ingredients: 1/2 cup of rice vinegar; 1 tablespoon honey; 1 tablespoon of water; 2 tablespoons of soy sauce; 1 tablespoon peeled and minced ginger (I was out and substituted just a mere teaspoon of dry); and 1 tablespoon of prepared horseradish. I simmer the ingredients over medium-low heat for about two minutes. When the chicken is cooked, I place it on a serving platter and cover it with the marinade. Then I let this sit there while I prepare the rest of the meal. You can serve right away if you prefer.

My side dishes will be boiled sweet potatoes and steamed broccoli. I prefer to keep things simple with the vegetables to not add extra calories or prep time. I simply peel and cut three medium-sized sweet potatoes, cover with water and boil until a fork can easily pierce a chunk or two. I then toss with a bit of butter and salt and pepper but this is optional. For the broccoli, I simply place about two cups of cut up broccoli into a steamer and steam until just soft. I strongly dislike mushy broccoli so I really keep an eye on it and drain the water immediately to stop it from cooking.

While the vegetables are cooking, I periodically move the chicken around in the marinade to coat it evenly. When the vegetables are cooked I simply serve them with the chicken at room temperature.

Thursday, June 19, 2008

Prosciutto and Veggie Pizza


It is pretty easy to make pizza dough however, for a quick meal I just grab the ready-made pizza dough while shopping for my weekly groceries at Trader Joe's. My favorite is the Garlic and Herb dough because it adds a bit more flavor. About 20-30 minutes before you are getting ready to set up you want to take the dough out of the refrigerator, remove it from the plastic bag and let it sit on a lightly, floured board. You will leave the dough there for 20 minutes giving it time to get to room temperature and acclimate.

As the dough is sitting, I set up my ingredients for a pizza: 3 slices of prosciutto, cut into smaller pieces (you could fry these up and add them as crisp bits - al la bacon bits); 4 crimini mushrooms, washed and sliced; 2 scallions, with green tops included and chopped; 1/2 cup of tomato/pasta sauce; and approximately 1 cup of shredded cheese (I have a four cheese blend and some Mozzarella.

I set the oven to bake and preheat it to 450 degrees. Then I take out a cookie sheet with no sides and lightly spray it with olive oil. When my dough has been sitting for about 20 minutes, I gently knead it (adding more flour as necessary) and roll it a bit with a rolling pin. It takes a bit of work to stretch out the dough to a 10" circle as it keeps shrinking back down. As you get it close to the size you want, put it on the greased cookie sheet and continue to work and shape it. The oil should help keep it stretched out but don't hesitate to start adding your toppings.

Spread the tomato sauce around the dough and try to coat it as evenly as possible. Sprinkle the chopped scallions over the sauce; then carefully spread the prosciutto over everything; top that with the mushrooms (you could saute them a bit first but in the interest of saving dishes I keep them raw); and finally I cover everything with shredded cheese - add more or less per your preference.

Pop the sheet with the pizza into the hot oven and set the timer for 10 minutes. After 10 minutes - if the bottom of the crust seems to be firming up - slide it off the cookie sheet directly onto the oven rack to cook another 10 minutes. [To prevent drippings in your oven, place the cookie sheet on the rack directly below the pizza.] Using a cookie sheet without sides allows you to transition the pizza on and off and then back onto the sheet as necessary. When removing the pizza from the oven, you will want to put it back onto the cookie sheet because it is easier to deal with and you can cut it directly on the pan.


The dough of this pizza is a bit thicker than I prefer but it has a nice flavor and it fits the bill of a quick wholesome dinner. I serve the pizza with a side salad of heirloom tomatoes with a dash of basil infused olive oil and balsamic vinegar.

Wednesday, June 18, 2008

New Twist on Oven Baked Chicken


I really had a problem figuring out what to make for dinner and changed the menu as I encountered obstacles. I had originally decided to make pizza but changed the plan when I realized there were some cooked pinto beans that had to be used. So I decided to use the beans to make bean tacos and make pizza another night. Typically Luis uses canned, refried beans so it was new for me to try this with freshly made beans.

The beans that have to be used are whole and in a lot of broth. I will have to mash them and re-cook them with a bit of oil - aka refried beans. Using a potato masher, I mash the beans in the container while I heated a bit of oil in a medium-sized skillet over a medium-high burner. However, as I am mashing the beans I realize that they are way too soupy for bean tacos. I probably should have drained some of the fluid prior to mashing. So again I decide to change the menu and just serve refried beans.

Now I have to change my original plan for the chicken. With bean tacos I would have used a simmered sauce recipe for chicken. However, changing my plan has given me less time to really achieve the right flavor for a simmer sauce. Plus I realize that I am too hungry now to take the time. I want dinner to be made quickly and decide to do oven-baked chicken but I am going to make it more spicy. I preheat the oven to 400 degrees and prep a cookie sheet with a sheet of aluminum foil sprayed with olive oil.

I open a package of boneless chicken thighs (about six thighs) and rinse them in lukewarm water. I decide not to dip the thighs in eggs or milk (mostly due to laziness) so I set them aside while I prep the breadcrumbs. I use a bit over a cup of breadcrumbs, mix with 1/3 cup of Parmesan cheese, 1 tablespoon of chili powder, 2 teaspoons of thyme, and a bit of salt and pepper. I roll the thighs around the breadcrumb mix, put each one on the cookie sheet and pop she sheet into the oven. (Usually the oven is still pre-heating when I pop the chicken in.)

As the beans are re-frying, they are thickening up but they are still not thick enough to make into bean tacos so I feel justified in changing this meal the way I did. I turn them off for now since the chicken is still cooking and I need to make a bit of sauce for the chicken.

I heat the comal over a high burner and roast two fresh tomatoes and two garlic cloves. When the skin of the tomatoes starts to blister, I take them off the comal, remove the skins and place in the blender with the roasted garlic. I puree the tomatoes and garlic then heat a bit of oil in a medium-sized saucepan and pour the puree into it. I add 1 teaspoon of oregano and a bit of salt and pepper for flavor. I let this cook until the sauce gets a bit darker.

I check the chicken and turn over the thighs. The side of the thighs that was on the cookie sheet is nicely browned and crisp so it is the perfect time to turn them over. I set up each plate with a quarter of an avocado, thinly sliced and wait for the chicken to finish cooking (total cooking time is 25 to 30 minutes).

Dinner at a Friend's House


A night out is always a treat and it is wonderful to share a meal at a friend's house. We had an impromptu dinner party midweek. Danielle invited Luis and I over for dinner and suddenly found herself hosting Luis' godfather, Jose Luis - unexpectedly in from Mexico - and Luis' mother, Trini. She was a great sport about the whole thing and it was a wonderful meal and evening.

Danielle found a recipe for Chicken Tenders with Cilantro Pesto online recently and decided to make this for our group. It was a very tasty meal and very easy to make. First she set up the marinade; 1/4 cup lime juice, 1/4 cup soy sauce, 1 tablespoon of canola oil and 1 teaspoon of chili powder was placed in a large bowl and whisked briefly. She reserved 2 tablespoons of the marinade and placed it in the bowl of her food processor (for the pesto). She added the chicken tenders to the remaining marinade and tossed it a bit to coat each piece. She set this aside to marinate (should give it 20 minutes to 1 hour).

While the chicken is marinating, Danielle started making the pesto. She toasted 2 tablespoons of sesame seeds in a small dry skillet over low heat and stirred them constantly until they were golden and fragrant (about 2 minutes). As she was keeping an eye on the sesame seeds she placed the other ingredients in the food processor with her reserved marinade; 1 bunch of cilantro (stems removed by twisting about mid-bunch) and 2 shallots roughly chopped. When the sesame seeds were toasted she added them to the food processor and processed the mixture until it was fairly smooth. (The recipe calls for scallions but the shallots add that hint of garlic which I think it more important for a pesto.)

To round out the meal, Danielle served the Quick Vegetable Soup (another recipe I got from her), some steamed quinoa and steamed asparagus. Everything was delicious and Jose Luis - Luis' godfather had a lot of fun as did all of us.

Thursday, June 12, 2008

Frittata - the Fail Safe Plan for Dinner

So one night last week I had no plan for dinner - I had defrosted nothing and was really not interested in cooking. But as usual I talked myself into cooking because with all the food we have in the fridge it would be ridiculous not to.

The always fail-safe meal; frittata, an Italian omelet. Here is where having a steady supply of eggs, cheese, milk and various vegetables comes in handy. I scrounged in the freezer for sausage (I try to keep a stash of chicken apple sausage or breakfast links handy) and found some. I defrosted them by heating two of them in a skillet with a bit of water and proceeded to review my options in the fridge. The beauty of a frittata is that you can use whatever vegetables you have handy; mushrooms, tomatoes, zucchini, broccoli, etc. The choice for this one would be some scallions, crimini mushrooms and zucchini.

Crack six eggs in a bowl; add about two tablespoons of milk, and a scant quarter cup of cheese (usually I use the Parmesan/reggiano mix but in this case I am out and only have a four cheese shredded mix). I slice the green part of a scallion and add to the bowl of eggs with a bit of salt and pepper and briskly whisk the whole thing. I then set this aside. I turn on my oven to broil so that is warm when I am ready to put the frittata in for the final browning.

Then I wash about 5-6 crimini mushrooms and one zucchini; I slice the mushrooms and cut the zucchini into mouth sized bites. I heat the omelet pan with a bit of olive oil. When the oil is to the point of smoking, I drop in the mushrooms and zucchini and saute it until it gets soft with a bit of browning on some surfaces. When it looks perfectly cooked to eat, I take it off the heat and add the browned mushrooms and zucchini to the egg mixture and mix it all. I take the pan I just used to cook the vegetables and add a tablespoon of olive oil and a bit over a tablespoon of butter. (Traditional recipes call for almost half a stick of butter but I think this is a bit excessive).

I return the pan to the burner but this time the heat is set low. When the butter is melted I add the egg mixture and with a spatula, I pull the cooked edges into the center of the pan. This is the technique used for omelet making, you do not want to scramble the mixture you just want to pull the cooked edges toward the center and let the uncooked egg drain to the edge. You repeat this process until most of your egg is firm and there is a bit of runniness on top. You then pop the pan under the broiler and let the top cook for just a few minutes. (Usually the time it takes you to add a sausage to each plate and tell everyone dinner is ready.)

This recipe makes four good sized slices. We served ours with sausage, toasted raisin bread and orange juice.

Saturday, May 24, 2008

Quick Berry Tart

Last weekend we were invited to dinner at a friends' home and I wanted to bring something for dessert. After a few very rare hot days in San Francisco, we were suddenly engulfed in the typical fog that follows. We were headed out to their house to enjoy some of the inland heat so I thought they would appreciate something freshly baked but summery.

First I made a sweet, buttery pie crust since it would have to chill a bit before rolling it out. In my food processor, I put 1 1/8 cup of all-purpose white flour, 1/2 teaspoon salt, 2 tablespoons of sugar - I pulsed this mixture once or twice then added; 1 stick (8 tablespoons) of butter cut into pieces. I processed the flour mixture and butter for about 10 seconds - or until the consistency of cornmeal. I placed this mixture in a bowl and added 1 egg yolk and about 3 tablespoons of ice water - using a spatula I gradually mixed and gathered the mixture into the form of a ball. I then flattened the ball slightly, wrapped in plastic wrap and put in the freezer for 10 minutes. (If the mixture still seems dry continue to add 1/2 teaspoon of ice water at a time until it comes together. Additionally, rather than placing the dough in the freezer you can place it in the fridge but do not use it for at least 30 minutes.)

As you wait for the dough to chill, wash the berries you plan to use. I happen to have some strawberries. I wash, dry and de-stem each of them then slice them thinly; I want to place them in a thin layer over the pastry. When I have two cups of the strawberries sliced, I toss them with a scant teaspoon of sugar and a small capful of orange liqueur (you can substitute a squeeze of fresh lemon juice). I set these to the side until the pastry is ready to be rolled.

I turn my oven onto 425 degrees to bake. After the dough has set for 10 minutes, I place the dough on a floured board and gently roll it out. It doesn't have to be beautiful but you want it to get it to be a rough 9- to 10-inch circle. You place the rolled pastry on the cookie sheet and gently fix any holes or cracks by pinching with your fingers or "filling in" with a bit of extra pastry from the edges. Then gently place the fruit on top of the pastry and leave yourself about an inch to an inch and a half of an edge. You will gently fold this over to keep the juices from spilling onto the cookies sheet. The whole thing should resemble a fruit pizza essentially.

Melt 2 tablespoons of butter and gently brush the exposed pasty and the top of the fruit all over. Bake the tart for 20-30 minutes; until the pastry is golden brown and the fruit is bubbly. Remove from the oven and cool before serving. You can serve warm or at room temperature with a bit of whipped cream or ice cream.

Quick Vegetable Soup

I have always leaned toward making heavier soups or stews and felt that they should be made a day ahead to really catch the flavors. However, there are times when you get home and suddenly crave a soup that is warm and flavorful but not out of a can.

One night while at a friend's house for dinner she completely changed my outlook - she made a wonderful pureed vegetable soup in about 30 minutes. Suddenly our whole outlook for winter changed - we could have soup much more often and I no longer had to make huge pots of one type of soup to freeze it for future use.

The beauty of this recipe is that it contained vegetables that I typically keep in my fridge; onion, garlic, carrot, zucchini, broccoli and potatoes. However, you can vary it if you lack an ingredient or want to tweak the flavor. Additionally, you increase or decrease the ingredients depending how much you want to make. It does freeze and reheat well but it is so easy to make on the fly that small batches are good too.

To start, rough cut all your vegetables - they don't have to be pretty because you will be pureeing them all. (I wash the carrots, zucchini, broccoli and potatoes with vegetable wash but do not peel anything.) Use the following amounts for a vegetables will produce roughly 10 cups of soup;

  • 1 small onion
  • 2-3 cloves garlic
  • 3 medium-sized carrots with skin
  • 2 medium-sized zucchini
  • 1 small head and stem of broccoli (or half a bag prewashed)
  • 5-6 medium-to-large baby potatoes with skin

In a larger, deep-sided pot heat about 1-2 tablespoons of olive oil and saute all the vegetables for about 5 minutes - stirring intermittently. Then add 1 quart of broth - I tend to use vegetable but chicken is also good. You want the liquid to just cover the vegetables so you might have to add another cup or so of water. Cook over medium to low heat until the carrots and potatoes are soft - about 20 minutes.

Turn off the burner and remove the pot from the stove (or to a cool burner). The fastest and least messy way to puree the soup it to use an immersion hand blender. However, if you only have a traditional blender you will have to puree in batches. I suggest using a slotted spoon to scoop out vegetables and using only a bit of your broth - this will minimize the danger of the lid of your blender "popping" off with the pressure from the heat. You might even consider letting the soup cool a bit before pureeing in a traditional blender.

When you have pureed the soup, salt and pepper to taste and add one teaspoon of dried thyme (optional but adds nice flavor). If you want the consistency to be a bit thinner simply add more broth or water. You can serve with wheat crackers and some nice mild cheese as a side. Frankly sometimes just having a bowl or two of soup with crackers and cheese is enough for us for dinner but usually I serve with oven-baked chicken thighs or a fillet of sole. If you are having a dinner party, you can simply use this as an opening course.

Thursday, May 22, 2008

One Dish Meal - Chicken Apple Sausage and Pasta


This is one of those meals that I whip together if I forgot to defrost anything. I almost always have some type of sausage in my freezer that is already cooked and just needs to be reheated. One of my favorite is Aidell's Chicken Apple Sausage; it has a light, smoky flavor and works well cooked with several types of vegetables. (My other favorite use for these sausages is for pigs-in-blankets appetizers but we will discuss those another time.)

If my sausages are frozen, I place four sausage links in a skillet with about 1/2 cup of water; cover them and turn the burner to medium-high. This will defrost them quickly and I will only have to cool them enough to slice them to toss with the vegetable saute.

Next, I set a large pan of water to boil for pasta. My favorite shape to use with this is a bowtie pasta a.k.a. Farfalle. I will use a bit over a half pound of the Farfalle. I give myself about 5-10 minutes for the pasta water to start boiling and another 10 minuts for the pasta to cook. The vegetable saute will be the "hardest" part of the prep for this meal.

The first step is to scope out my vegetable options; I find onion, garlic, broccoli, zucchini, spinach, crimini mushrooms, tomatoes, etc. I can use any combination of these but I choose the following:
  • half of a small, onion - thinly sliced;
  • 1 clove of garlic - finely chopped/minced;
  • 5-6 crimini mushrooms - thinly sliced;
  • 2 cups broccoli - cut into bite-sized pieces and steamed.

I set the burner to medium-high under a large skillet with a bit more than a tablespoon of olive oil (add more if needed). When the oil starts to smoke, I add the onion and saute it for 1-2 minutes until it starts to become translucent. I then add the garlic and when the smell starts to rise up from the pan, I add the mushrooms. As the mushrooms are cooking, I slice the sausage into bite-sized pieces. Just as the onion, garlic and mushroom mixture starts to brown I carefully add about 1/4 of white wine. (Alternatively, you can add broth but I like how the wine cooks away. You don't want very much liquid at all.)

Just as the wine starts to cook away (and it will happen quickly) I add the sliced, chicken apple sausage and the steamed, broccoli and stir it all together. At this point, turn off the burner, cover and set the saute to the side. If you pasta is cooked already, drain it, put it in a large serving bowl with 1-2 tablespoons of butter (this is optional but it adds a bit of richness to the sauce. Alternatively, use a vegan, heart healthy substitute like Earthbalance if you love butter like I do you honestly won't notice the difference.) Add the vegetable and sausage to the pasta and toss it all together. Then bring to the table so everyone can help themselves. I typically serve with bread and cheese as a side.

This recipe is typically enough for us to have a serving plus a bit extra for dinner and then enough for two lunches the next day.

Mahi Mahi Braised with Green Mole


My favorite use of green mole is as a sauce for fish. I have some mahi mahi defrosted so I decided to braise it with a bit of the mole and serve with rice and green peas. I start some white basmati rice in my rice steamer and - to make it more flavorful - I add a few sprigs of cilantro and use chicken broth rather than plain water (1 cup basmati rice, 2 cups liquid and 3-5 sprigs of cilantro). Alternatively, you could chop the cilantro and stir it in after you cook the rice - this is a bit more work but would give you a "fresh" cilantro flavoring.

While that is cooking, I rinse my fish fillets, pat them dry and set aside. I also set up some frozen, organic peas in a pan of water that I will boil later. I wait until the rice is cooked to start both of the fish and peas because I don't want to overcook the fish. Fish is very delicate and cooks quickly; many times people who don't like fish have eaten either overcooked or not very fresh fish. When you buy fish it should smell fresh and only faintly like fish - if it smells strong or even overpowering then it is starting to turn bad and you shouldn't buy it.

My rice cooker turns itself off when the rice is cooked with a loud pop. It cooks that small amount of rice quickly (10 minutes) but this will be enough for dinner and a few lunches. I set the heat under my saucepan with frozen peas to high - I will turn them off as soon as they boil.

Under a large, skillet I add about two tablespoons of olive oil and a scant tablespoon of butter. I turn the burner on to medium-high heat. When the butter is melted and starts to sizzle, I add my mahi mahi fillets (I have about four-medium sized fillets no more than 1/2 an inch thick) and when a bit of white edging appears on each fillet, I turn them over. I then add about 1/3 of a cup of green mole to the pan and cover. I cook this for no more than 3-5 minutes depending on the size of your fillets. (I don't mind my fish even a bit underdone so in this case I turned the heat off after about two minutes and left it on the burner covered while I set up plates for dinner.)

With the mole already made, the rest of the meal takes no more than 20 minutes. It does payoff to make some items ahead of time and freeze them in batches that are easy to take out and use to enhance small meals. This recipe serves two for dinner and leaves leftovers for two lunches over even another meal if you don't like reheating a fish lunch at work.

Sunday, May 18, 2008

Tamale Follow-up

The tamale-making event was exhausting so all meals last week were either left overs, quick meals and even a few nights out. Monday night we had a 20-minute meal; frozen, meatballs (store bought - not my own); spaghetti; a can of pasta sauce; and warm bread.

Tuesday night I decided to steam a bag of tamales. When we packed up the tamales, we put about 20-25 tamales in Ziploc Freezer bags. I feel it is most efficient to steam a batch versus just a few at a time so I set up a large steamer pan. Ideally, you would set up a bed of wet corn husks on top of the steamer pan to protect the tamales from direct steam contact and enhance flavor. However, I have none left from our Sunday event so it is okay to just steam them directly in a pinch. I prefer a pan large enough to stand the tamales upright so that they cook more evenly. However, some people cook them by stacking them.

If you defrost the tamales, it should take about an hour to steam them. (Frozen tamales can take 60 to 90 minutes to cook.) The masa becomes light and fluffy - similar to a muffin. When I believe the tamales might be done, I take one out and unwrap it to confirm that the masa is cooked all around. If it isn't, I just return it to the pan and let it cook some more. Having 20-25 tamales is a bit much for two people to eat in a week so after we eat a few for dinner I return the rest of the cooked ones to the freezer. Now when I want to have some more we will only have to heat them for about 10-20 minutes (depending on whether the tamales are defrosted or frozen) in a steamer.

Additionally, I discovered that the sweet tamales were really good drizzled with honey just after they were taken out of the steamer. The honey enhanced the flavor just a enough. However, I still feel the need to perfect this recipe.

Also, we have one injury confirmation - a sprained finger from kneading masa dough. Marnie joked that she might have hurt herself but she said later her finger was swollen and she purchased a splint to minimize movement. So far she says she is impressing everyone who asks how she injured herself that it was due to making tamales.

Wednesday, May 7, 2008

Pork with Green Mole


Since I cooked green mole in the afternoon, I am going to take advantage of that for dinner and make something quick. I have some pork tenderloin spears (the package is a bit over a pound) in the freezer so I defrost those and slice them into smaller pieces; almost bite-sized.

I want to brown the pork prior to adding the mole for better flavor. (This method of browning and then finishing the cooking in a moist heat is referred to as braising.) I heat some oil in a medium-sized skillet on medium-high heat and just as it starts smoking I add the pork a batch at a time but work quickly to avoid overcooking the meat. When all the meat is a browned (few signs of raw, pink meat) I add a ladle of green mole (approximately 1/2 cup); cover and let cook for about 5 minutes.

I serve the pork with steamed rice, corn and some quesadillas or just plain tortillas. In this case, we have enough leftover oven-baked rice (recipe from Fish for Dinner) that I will reheat that. However, if you have to cook the rice start it in advance since it takes about 20 minutes; 1 cup of raw, long grain rice to two cups of water or broth and bring to a boil over medium to high heat; reduce to medium low, cover and cook for about 15 minutes.

Tuesday, April 22, 2008

Lamb on a Weeknight


I learned from my mother that Trader Joe's sells lamb tenders - a bit pricey at $12.99 per pound - but Luis doesn't like leg of lamb or lamb chops. The only lamb he likes is little lamb tender skewers we order when we go to Zarzuela's - our favorite Spanish restaurant.

My menu plan will stay simple to highlight the flavor of the lamb. I marinate the meat with a scant tablespoon of fresh rosemary, half a teaspoon of dried thyme, teaspoon of chopped garlic (one clove), salt, pepper and a tablespoon of lemon infused olive oil. It would be a hassle to set up the grill so I am going to broil the meat.


I will serve oven-roasted potatoes and steamed broccoli. I cut small white fresh potatoes in thin wedge slices and toss with olive oil, salt and pepper. I lay the potatoes on a cookie sheet (the kind with edges), cover with tin foil and place in a 425-degree oven. After 10 min, I remove the foil, use a spatula to flip the potatoes and return to the oven for another 10 min. I continue to do this until they are cooked well but in this case I am not crisping them.

Shortly after placing the potatoes in the oven, I place the lamb tenders under the broiler. I turn them over after 10 minutes and cook them until a meat thermometer in the thickest part reaches 125 degrees. The meat should be a bit red and slightly juicy.
In the final stages of the potatoes, I turn on my broccoli, which is in a pan with a steamer. I like my vegetables to be fresh and green looking but steamed enough to take the crunch out of it. It was a nice meal and cooking time was as little as 30 minutes; total meal preparation time was an hour.

Welcome

Thanks so much for visiting our site. Please feel free to leave comments telling me what you like about the site or postings as well as any feedback that might make viewing easier for you.